Tim's XY Stepper Controller
Current: Tims_XY_Stepper_Controller.zip version 3.1.0.20
I use this to control plotter in my Blog here: Tim's XY Plotter.
Note! this is an Open-Loop Controller.
There is no feedback from the device except the "ok" handshake.
It sends the codes and expects them to be followed.
I am not a Professional at writing software, I am self taught and I do it as a hobby.
Most of my software is work in progress, so treat accordingly.
(Also garbage in garbage out rule applies)
I will do some instruction on use as I get time.
I am not a Professional at writing software, I am self taught and I do it as a hobby.
Most of my software is work in progress, so treat accordingly.
(Also garbage in garbage out rule applies)
I will do some instruction on use as I get time.
I'm always working on this program.
This is the Main part:
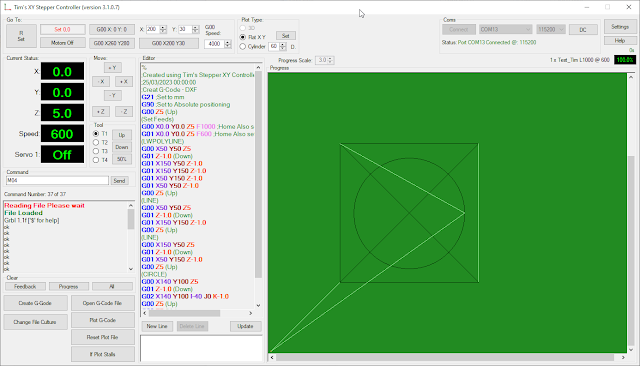
The main program controls my projects that receive G-Code commands.
It shows graphically what commands have been sent to the device.
Has buttons to send commonly used commands.
Shows current sent position of plots.
There are settings to quickly set some global values depending on the
project I am controlling.
There are some Language Settings for:
Türkmen
Türkçe
Pусский
Not all parts have been translated, some of the later additions are only
English.

There is a sub program to create G-Code files from various sources.

Most of the converters are work in progress.
Also are fairly basic.
They do work well if used correctly, most of my code is written for me,
and so I don't often write functions to compensate for idiots, if you
want to crash it you probably will succeed.
It converts to my adaptation of G-Code, it uses M03 and M05 to raise and
lower servo, turn on off laser. With a power level "L" to set the power.
I have put the option to use "Z" position for up and down.
It also has a checkbox to make it grbl friendly, this puts the 'S' for
spindle speed in the "M03" command. The "M03" is used for both up and
down in grbl friendly mode with the 'S' value altering the PWM for
motors, lasers and servos.
It is not CNC conversion, it is Plotter compatible.
There are now Eight Tabs:
Gerber:
Not got my head around this yet, it is something I want to have a go at
some time.
DXF:
This works with 2D drawings that have objects listed in ENTITIES. (not
referenced objects)
I use LibreCAD and
it handle file created and edited with it quite well.

SVG:
This only works with basic Vector Graphics, I originally wrote it to
plot with a laser, silk screen produced with
Fritzing. I now
use KiCad which
outputs DXF, so I do that now. (wont be doing any more work in this
converter)

TEXT:
This has a basic editor so that you can create text files.
The text files can be loaded or saved as RTF files.

Handwriting:
This is similar to the Text to G-Code, but it uses CAD files (DXF) to
draw the characters.
Handwriting outline is scanned and converted to vector graphics. The
vector graphic is then edited in CAD to create a DXF file of each Hand
Written Character.

I use this sheet:
Character_Set.svg
To write all the characters by hand, then scan the form so that they can
be converted to DXF.
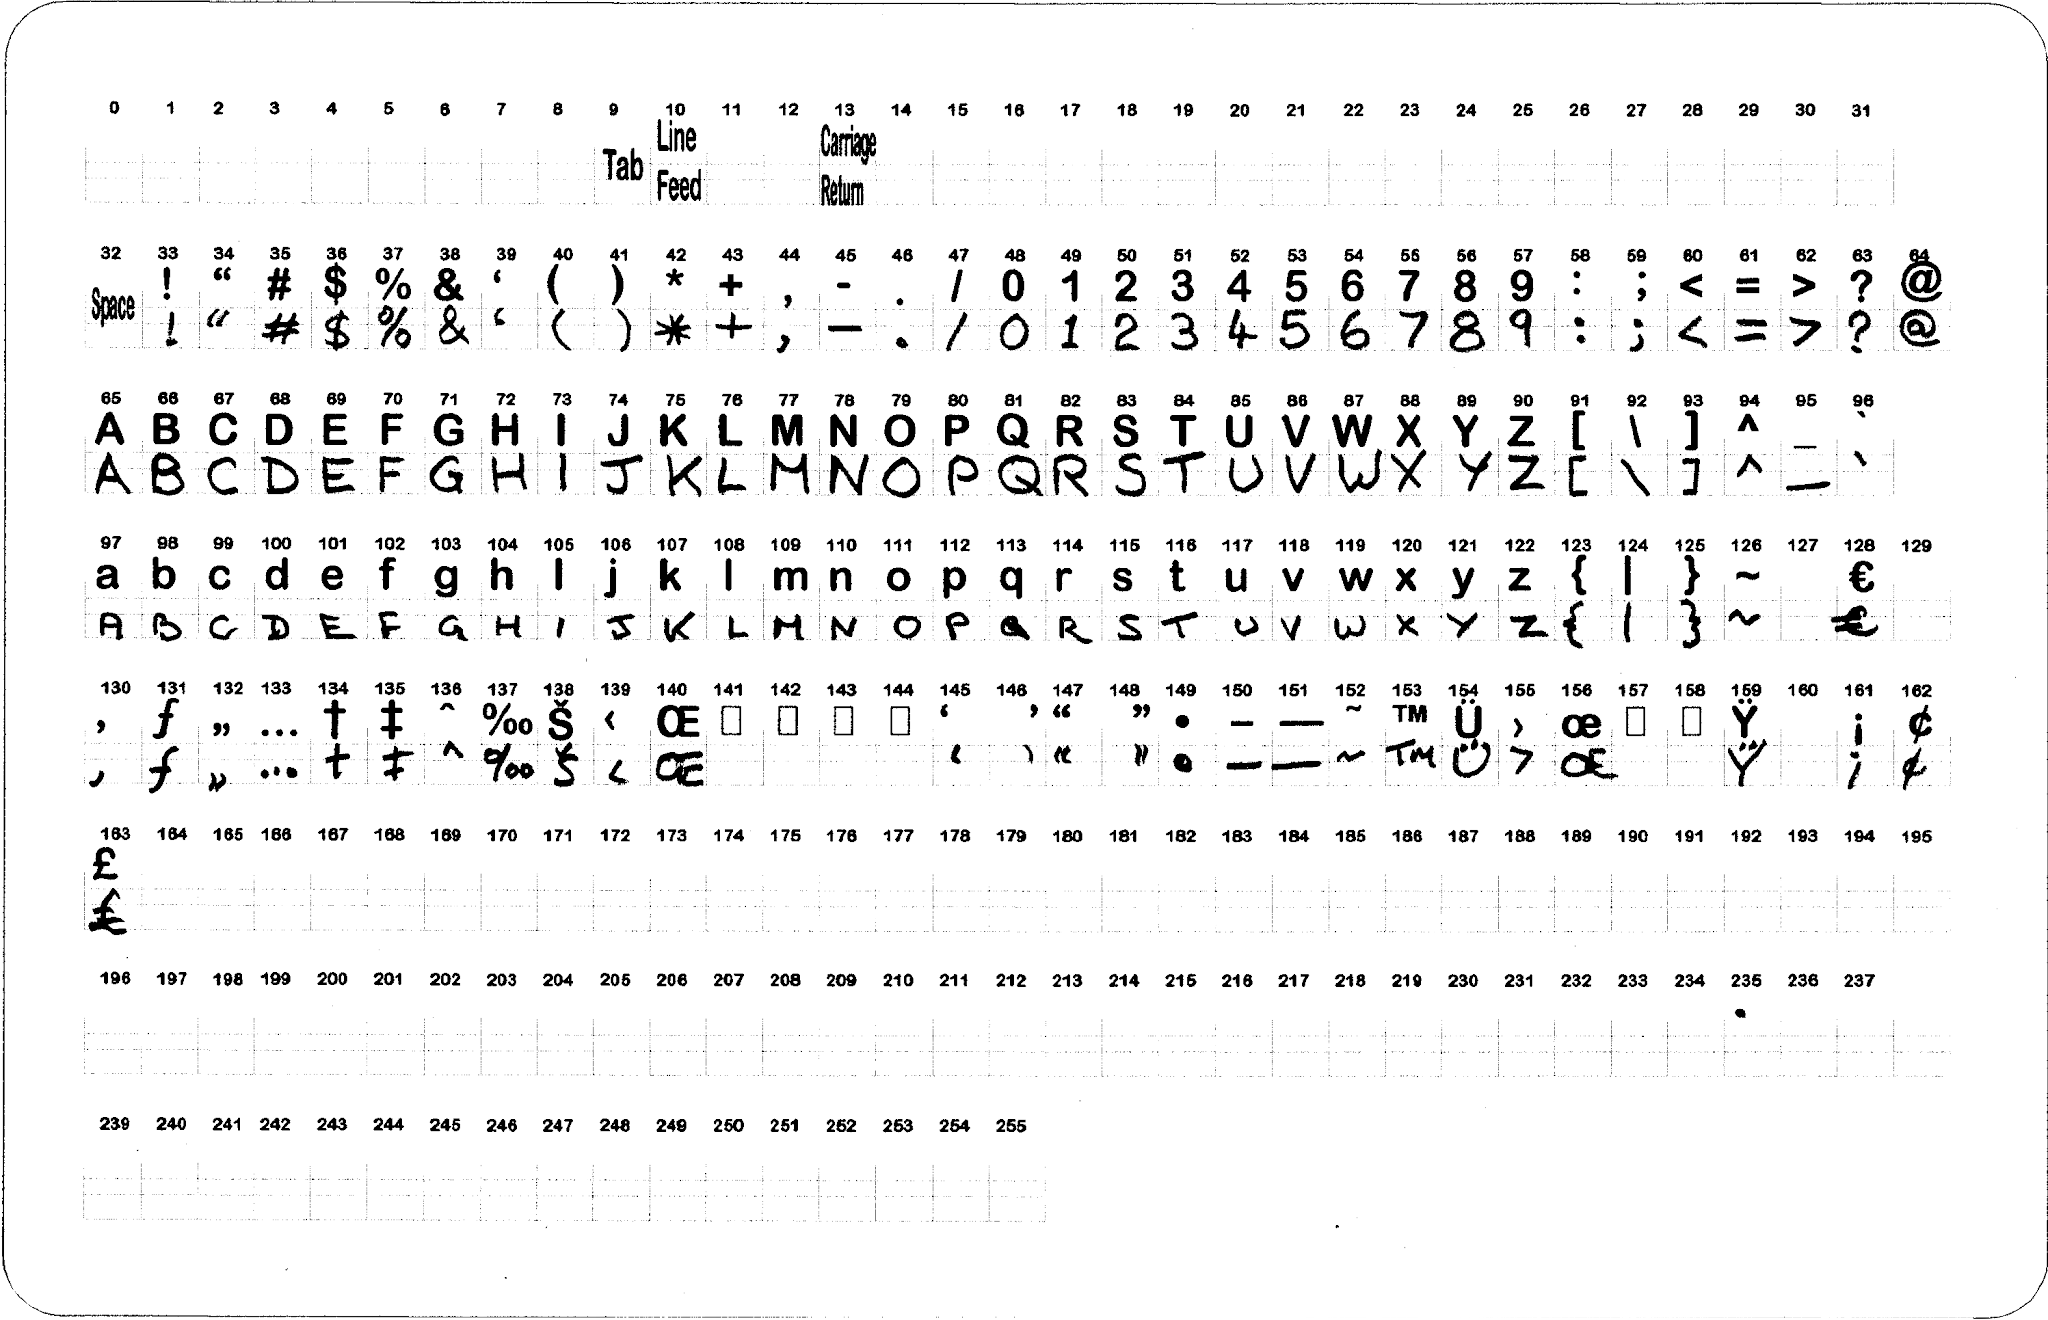
The default size for the characters is 5 mm high (Capitals)
I use Corel Draw to convert the scanned to vector outline, then export
the result to DXF, where I edit and create each Character.
This is a DXF template used when creating Characters:
Charactor_Template.dxf
Once created, I place all in a folder like have in Tims_HW (file
bellow), the folder must also have a file called: HandwrithinData.txt,
this file contains the spacing info for each character.
Here is a copy of my handwriting:
HandwritingFonts
Here is a video showing me creating characters for the program.
IMAGE:
Has adjustment of the pixels. It is something I am still working on.
I have written it to engrave images with my laser.
I have, had some good results so far.


PATTERN:
This was my first program to create test patterns, when I was making my
plotter.
It's based on the example programs that was published in the manuals for
Sony PRN-C41 or Commodore 1520 and CGP-115.

Folded Box:
This is for making folded boxes from card.
It is mainly for use with a laser to cut the pattern out.

If any one wants to use this program and needs help? Just ask.
No comments:
Post a Comment